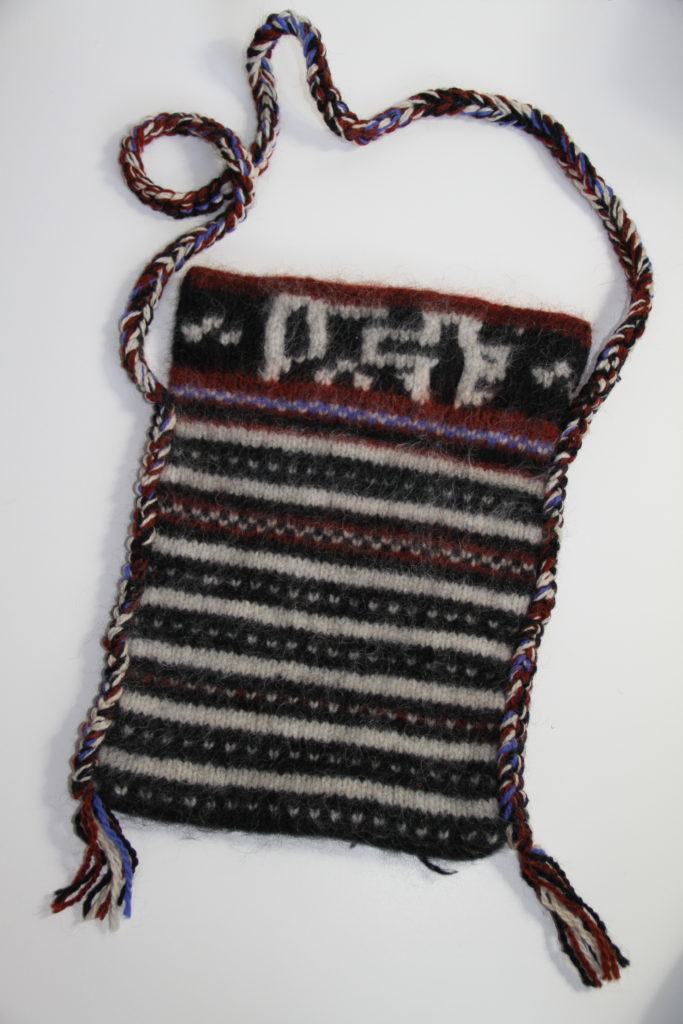
The colorways for this shoulder bag are borrowed from cloak designs from ancient villages in the High Atlas Mountains of Morocco, each with its own distinctive pattern. The Ait Haddidou people live in the High Atlas Mountains of North Africa, and one of their patterns is used in this piece.
The beauty of the traditional striped designs, from a knitter’s perspective, is that you never have to carry the yarn behind the work over more than two stitches, making this a good pattern for first-time stranded knitting. If you are new to color knitting, you might choose to skip the tattoo motif and knit only the striped sequence.
Please note: This pattern has not been fully test knit.
Finished measurements
Bag: 10 x 11 inches, 40 stitches across (80 around) by 71 rows long
Strap: 40 inches long
Gauge
16 stitches and 24 rows = 4 inches
Yarn
Peace Fleece – 1 skein each, 200 yards
A Baku Black
B Antarctica White
C Bhagdad Blue (approximately 5 yards)
E Sheplova Mushroom (approximately 20 yards
Needles
US size 8 (5mm) circular needle (or several double-pointed needles)
Notions
Large-eyed yarn needle
Fabric of your choice for lining (optional)
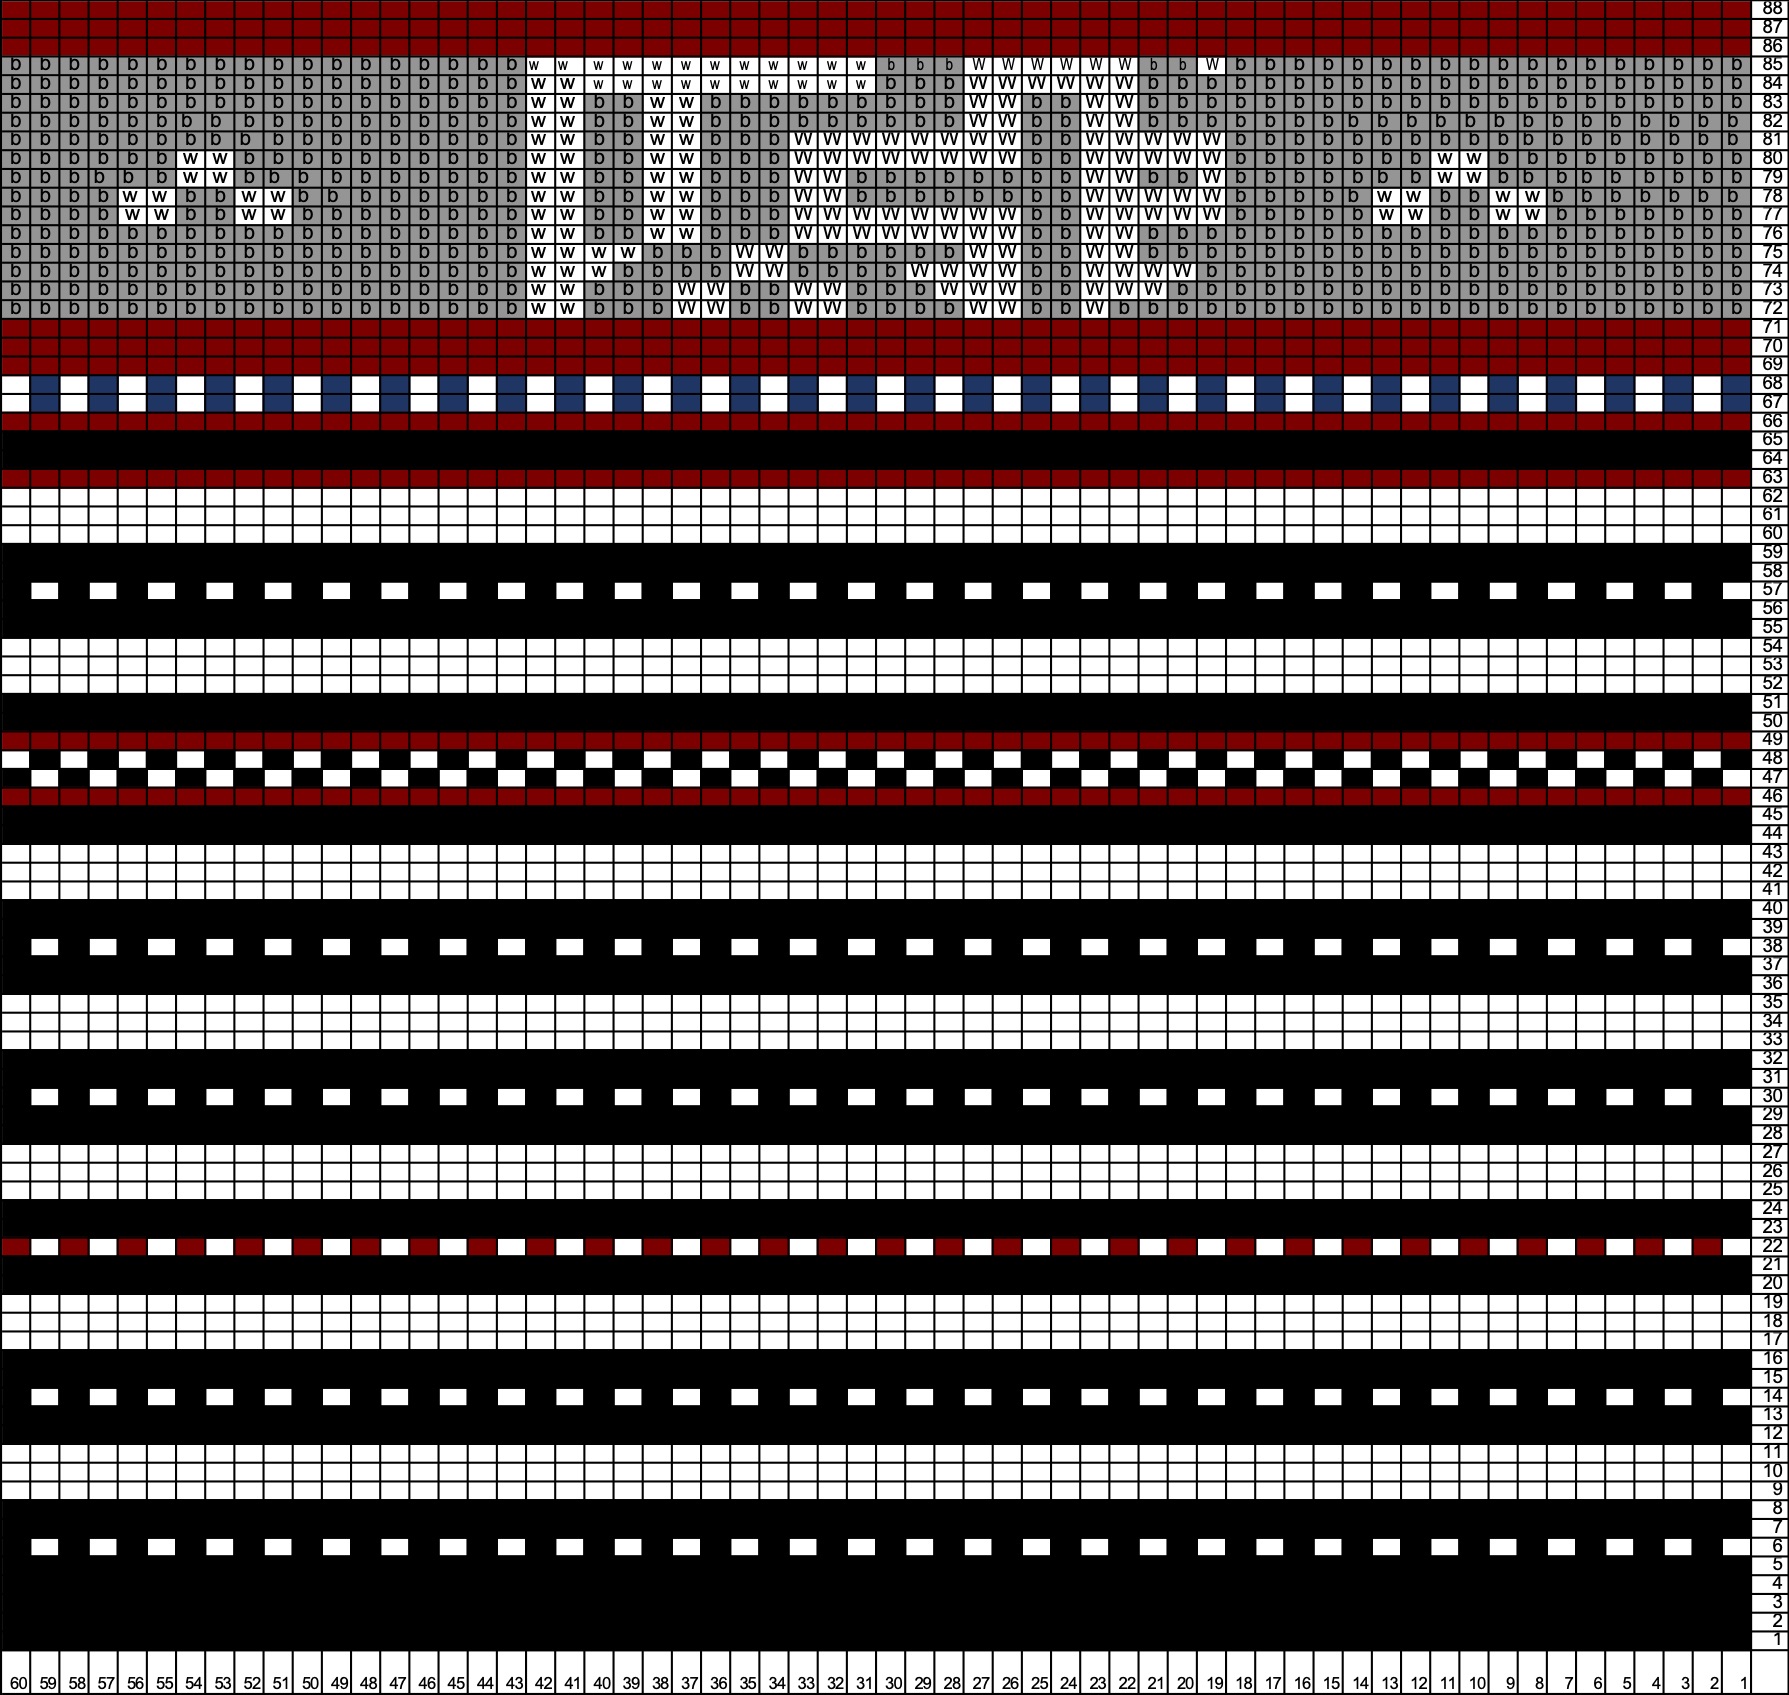
Color Key
B Baku Black
W Antarctica White
C Bhagdad Blue
E Sheplova Mushroom
Pattern notes: This pattern is knit in the round, starting from the bottom of the chart.
Instructions
Using A cast on 82 stitches, knit in the round, in stockinette stitch. Do not worry about the color jog – you will be sewing the strap on over it.
Follow the color chart from the bottom until you have completed the pattern. (It should be about 10 inches at the point where you start the border.)
Using mattress stitch, sew the bottom seam closed. (Sew this with the public side facing you.)
Finger-chain strap
Measure out 10 strands of 11 yards-long each (tying the strands to a doorknob) in a mix of colors.
Holding all 10 strands together, make a loop with a slip knot at one end – about 4 inches from the end for the fringe at the bottom.
With your fingers (or a very large crochet hook), draw a loop of the held-together strands through the slip knot, pulling down on the tail to tighten. Periodically, pull the loop to make it smaller and more easily handled.
Repeat until 10 inches remain. Pull the tail through the loop to close.
Tie a simple, overhand knot at either end, leaving 4-to-5 inches of fringe. Cut the fringe threads evenly.
Finishing
Felt lightly, wash the bag in hot water with a pair of jeans. Check to make sure it only felts lightly – just enough for the knitting to become a slightly fuzzy fabric.
Weave in ends.
Dry it over a flat piece of cardboard with a plastic bag over it or, if you want a square bottom, over a cereal box covered with a plastic bag.
Starting at the bottom, sew the straps on. Line up the knot with the bottom of the bag at the point where the colors shift on every row. Sew the strap along the edge, going over the stitches a few times at the top to reinforce them.
Repeat on the other side with the other end of the strap.
To create the lining:
Turn the felted bag inside out.
Measure the fabric against the bag up to the fold line where the top will fold inward and cut to match, leaving 1 inch for seams all around.
Use a small, invisible hemming stitch to attach the fabric to the felted bag. Baste the top down to the top edge of the bag.
Chart